Freewheel 11-34
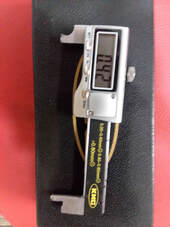
The 2018 Rad City came with a 14-34 freewheel on the back wheel. In order to have more pedal authority, I changed out the freewheel to a 11-34 setup. This new gear ratio is working out great! I also changed out the chain for a KMC Z72 from Amazon. Its a 116 link chain with removable quick link. The 11-34 freewheel can be ordered directly from Taiwan and shipped quickly from DHL International. To remove the freewheel, a freewheel removal tool is required. I used a Park Tool FR-1.3 freewheel remover from Amazon. I also ordered a digital chain stretch tool to measure how much wear I'm getting out of my chain. At 2,500 miles my new tool measured .42mm of chain stretch. When a chain is new the tool will read 0. As a guide, when the tool reads .8mm or more the chain is considered worn out and should be replaced. Chains should be checked more often when reading stretch greater than .4mm.
Freewheel removal and ordering instructions From Larry on Rad users group on FB.
For 2018 RadCity owners, I’ve had success switching the freewheel from the 14-34 to the 11-34 Specifics of how to purchase will follow as well as some tips for the removal of the original freewheel. I ordered two from Jay Lee in Taiwan and our communication was over email with payment being made by PayPal. All went flawlessly. They are $25 each and with two the shipping was $17 Here’s his original reply to me when I inquired as to their availability by emailing him at [email protected]
Yes, you can purchase them , we have the stock of the DNP-LY-1107MFN freewheels (7speeds ,11-34T)
The price is USD 25/pc, so the price is USD 50 for 2 pcs.
The shipping fee is USD 17, I will send it by DHL express , it will be arrival in 3-4 days.
The total price is USD 50 +17 = 67
Can you pay the payment by Paypal, my account is " [email protected] "
Thanks a lot
Jay Lee (End of email)
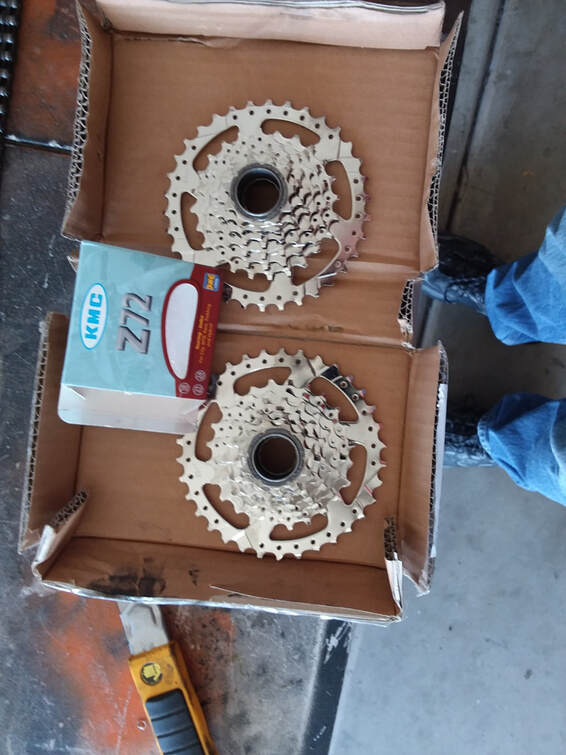
They arrived via DHL and are pictured after opening the box. For the 2018 RadCity’s you’ll need the ParkTool FR-1.3 You do NOT need the one with the cutout slot as the 2018 RadCity’s power cable enters on the brake side.
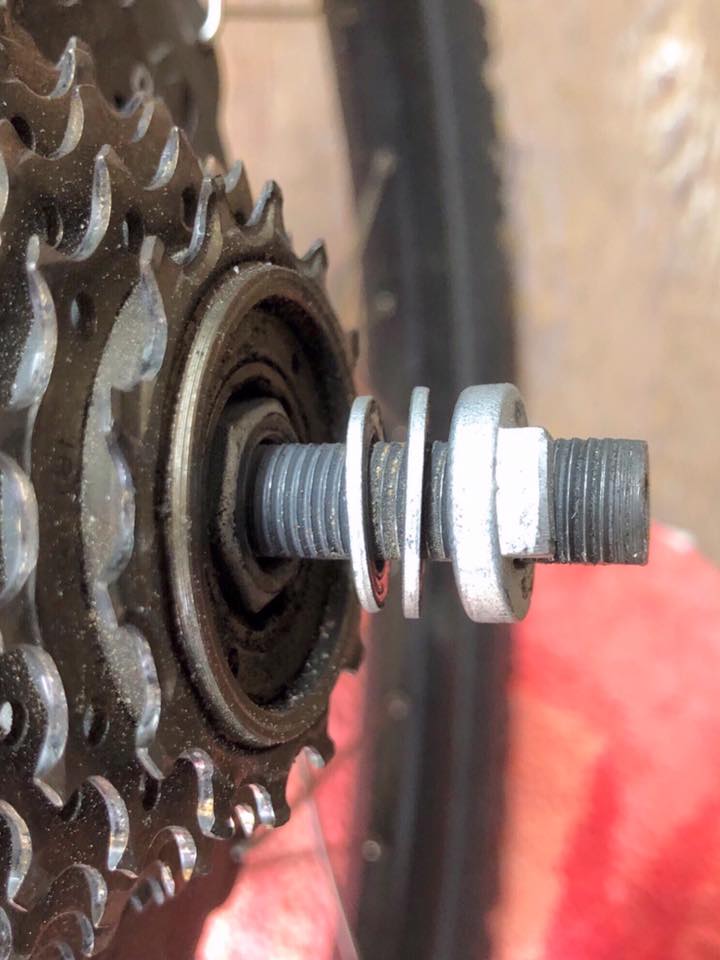
Here’s my best “how-to”. This will assume you know how to get the wheel off and know the proper order of nuts and washers for removal and reassembly.
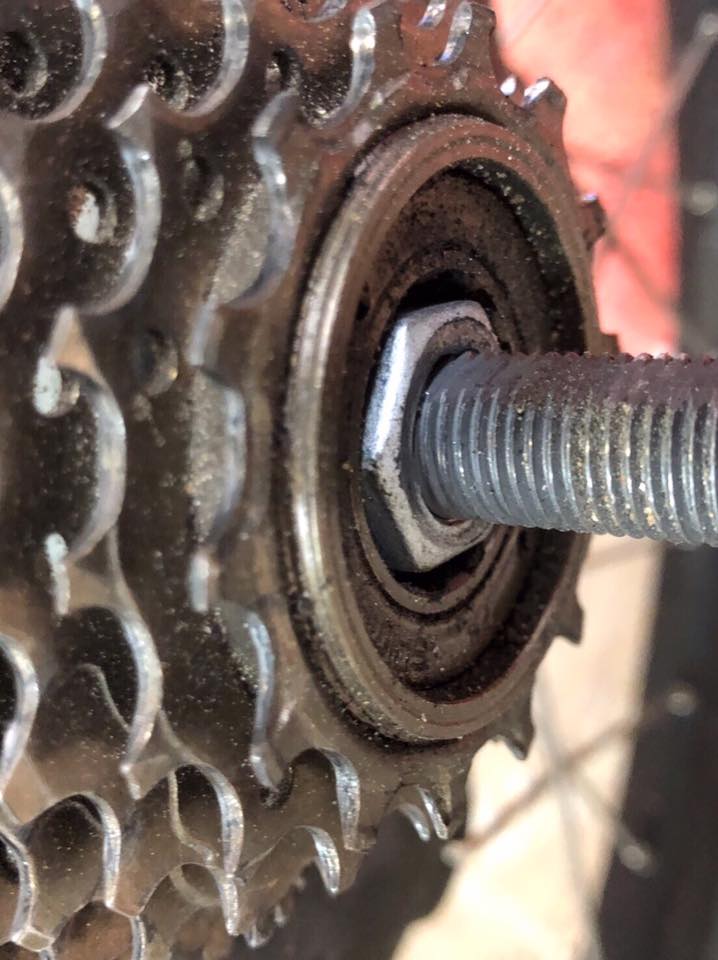
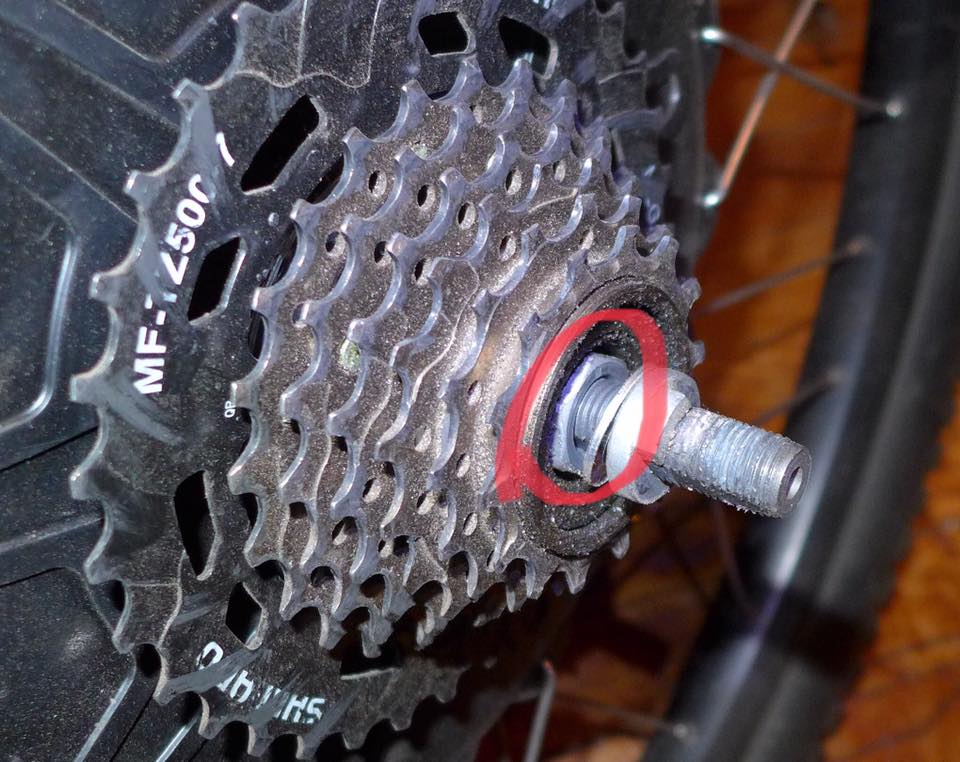
Once all the washers are off, here’s where it can be a bit tricky. The large nut circled in red HAS to be removed for the freewheel tool to fit. Believe me, it will NOT fit over that nut (axle nut). The trick is to slide a screwdriver into the side of the nut between the nut and freewheel. Hold that stationary and then rotate the axle from the other side by rotating it counter clockwise, thus backing out the nut from the other side enough to grab it. I used a small adjustable wrench to grip the axle over the flat areas of the axle. It backed out easily.
Once you have that axle nut off, then you can remove the freewheel. Slide the ParkTool into the freewheel and rotate counter clockwise to loosen. This is assuming, again, that you know the freewheel may be tight and know techniques to loosen it. There’s also a vice technique. I gripped the tool with vice grips and placed the wheel upright, bracing it against the wall so as to not move when applying pressure. It was tight but loosened by only applying pressure from above to the vice grips. An adjustable wrench could work but I’d suggest something hefty at least. Some add a breaker bar if it’s too tight. Make ABSOLUTELY sure you are loosening the right direction which, again, is counter clockwise.
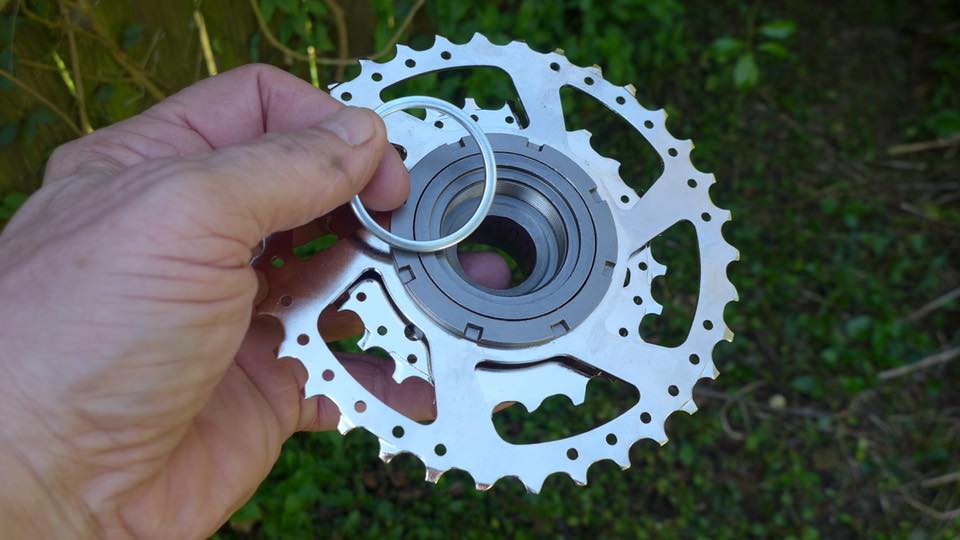
Once off, you’ll find two large spacers left over from the original freewheel (single spacer with pictured with new freewheel) Jay Lee tells me they’re not necessary for his freewheel. They are spacers designed to keep the freewheel from going too far into the hub. I used one just for good measure and all seems to be fine.
This is important... BEFORE putting the new freewheel on, screw that axle nut back onto the axle ALL the way to the end of the threads on the axle. It doesn’t have to be wrench tightened but at least snug.
Now screw on the freewheel and tighten with whatever method you use. I actually used a piece of old inner tube wrapped around the cogs and then pulled clockwise to tighten. At this point you’ll add the original washers and dropout washer that create the proper space to put the wheel back on.
Once the wheel and cables are all back on and secure, some minor derailleur adjustments were made. Now I’ve got that illusive 11 cog 7th gear!
Good luck.
Larry
For 2018 RadCity owners, I’ve had success switching the freewheel from the 14-34 to the 11-34 Specifics of how to purchase will follow as well as some tips for the removal of the original freewheel. I ordered two from Jay Lee in Taiwan and our communication was over email with payment being made by PayPal. All went flawlessly. They are $25 each and with two the shipping was $17 Here’s his original reply to me when I inquired as to their availability by emailing him at [email protected]
Yes, you can purchase them , we have the stock of the DNP-LY-1107MFN freewheels (7speeds ,11-34T)
The price is USD 25/pc, so the price is USD 50 for 2 pcs.
The shipping fee is USD 17, I will send it by DHL express , it will be arrival in 3-4 days.
The total price is USD 50 +17 = 67
Can you pay the payment by Paypal, my account is " [email protected] "
Thanks a lot
Jay Lee (End of email)
They arrived via DHL and are pictured after opening the box. For the 2018 RadCity’s you’ll need the ParkTool FR-1.3 You do NOT need the one with the cutout slot as the 2018 RadCity’s power cable enters on the brake side.
Here’s my best “how-to”. This will assume you know how to get the wheel off and know the proper order of nuts and washers for removal and reassembly.
Once all the washers are off, here’s where it can be a bit tricky. The large nut circled in red HAS to be removed for the freewheel tool to fit. Believe me, it will NOT fit over that nut (axle nut). The trick is to slide a screwdriver into the side of the nut between the nut and freewheel. Hold that stationary and then rotate the axle from the other side by rotating it counter clockwise, thus backing out the nut from the other side enough to grab it. I used a small adjustable wrench to grip the axle over the flat areas of the axle. It backed out easily.
Once you have that axle nut off, then you can remove the freewheel. Slide the ParkTool into the freewheel and rotate counter clockwise to loosen. This is assuming, again, that you know the freewheel may be tight and know techniques to loosen it. There’s also a vice technique. I gripped the tool with vice grips and placed the wheel upright, bracing it against the wall so as to not move when applying pressure. It was tight but loosened by only applying pressure from above to the vice grips. An adjustable wrench could work but I’d suggest something hefty at least. Some add a breaker bar if it’s too tight. Make ABSOLUTELY sure you are loosening the right direction which, again, is counter clockwise.
Once off, you’ll find two large spacers left over from the original freewheel (single spacer with pictured with new freewheel) Jay Lee tells me they’re not necessary for his freewheel. They are spacers designed to keep the freewheel from going too far into the hub. I used one just for good measure and all seems to be fine.
This is important... BEFORE putting the new freewheel on, screw that axle nut back onto the axle ALL the way to the end of the threads on the axle. It doesn’t have to be wrench tightened but at least snug.
Now screw on the freewheel and tighten with whatever method you use. I actually used a piece of old inner tube wrapped around the cogs and then pulled clockwise to tighten. At this point you’ll add the original washers and dropout washer that create the proper space to put the wheel back on.
Once the wheel and cables are all back on and secure, some minor derailleur adjustments were made. Now I’ve got that illusive 11 cog 7th gear!
Good luck.
Larry
|
I found a limited supply of the 11-34 Freewheels on Amazon!
|
|
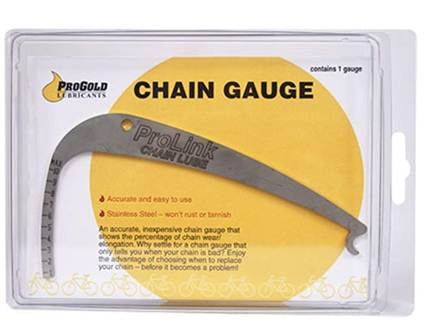
ProGold Chain Checker
A less expensive option than digital.
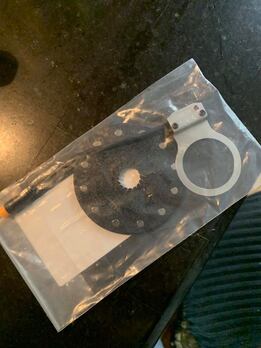
If you are replacing the magnet sensor, you will need a crank puller to remove the crank arm.
|
Use this tool to remove the crank arm off the Rad Rover
|
|
It was noted that if you are replacing the sensor I believe you need a bottom bracket tool as well because the sensor is behind the bottom bracket lock-ring.
Click to set custom HTML
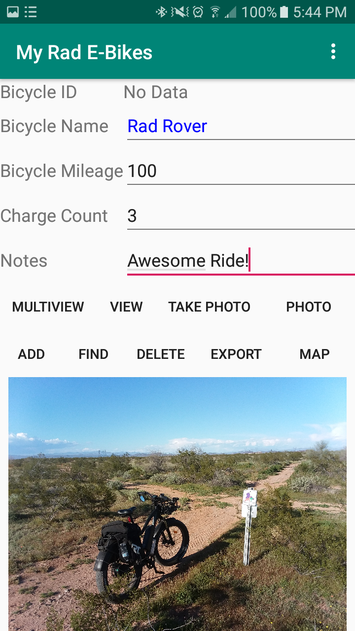
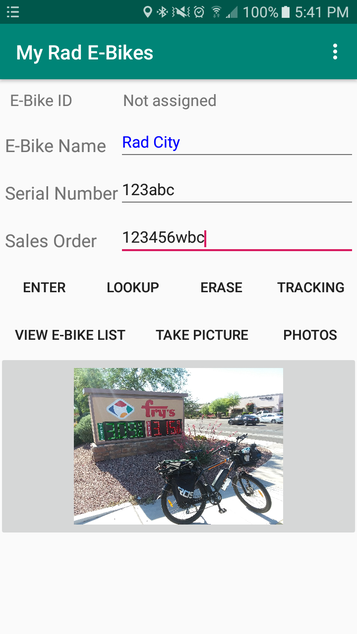
Download my free E-Bike tracker for you phone. Keep important info on your bike handy with this app!
|
|
Affiliate link/advertising notice:
I am a participant in the Amazon Services LLC Associates Program, an affiliate advertising program designed to provide a means for sites to earn advertising fees by advertising and linking to AMAZON Sites. When you click on an Amazon link above and buy something through Amazon, Amazon may give me a small commission.
I am a participant in the Amazon Services LLC Associates Program, an affiliate advertising program designed to provide a means for sites to earn advertising fees by advertising and linking to AMAZON Sites. When you click on an Amazon link above and buy something through Amazon, Amazon may give me a small commission.
