Boom Vader Modifications
CURRENTLY, I HAVE OVER 3,000 MILES ON MY VADER! WITH MY MODIFICATIONS MY MILEAGE IS A LITTLE LESS AT ABOUT 74 MPG! I CONSISTANTLY GET THIS MILAGE PER FILL UPS! I'VE DONE THE MODS TO MY VADER BUT IT ALSO RAN PRETTY GOOD OUT OF THE BOX. IT SITS A LITTLE HIGHER THAN THE LIFAN KP MINI 150. BUT, DONT LET THIS VADER PASS YOU BY! SHE CAN CRUSE AT 55MPH AND I WEIGH IN AT 215LBS! IN COMPARISON, THE LIFAN KP MINI 150 GETS UP TO SPEED QUICKER BUT, THE VADER IS CHEAPER AND ONCE YOUR CRUSING AT 45-55MPH THEY BOTH SEEM ABOUT EQUAL. GRANTED, THE LIFAN KP MINI 150 DOENT HAVE TO WORK SO HARD TO RUN. BUT, MY VADER HASNT LET ME DOWN ON MOTOR PERFORMANCE. I'VE ALWAYS GOT ROOM FOR THE LITTLE VADER IN MY GARAGE.


|
ORDER A BOOM VADER ON THE CLICKABLE IMAGE ON THE RIGHT!
|
 |
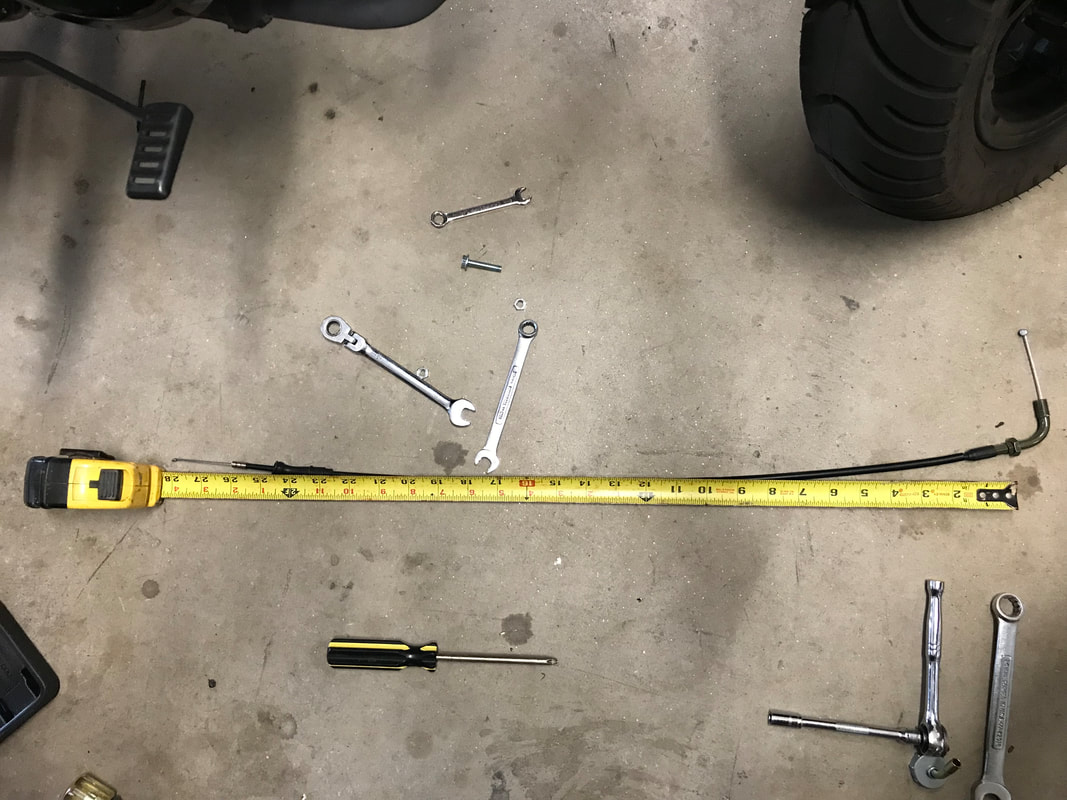
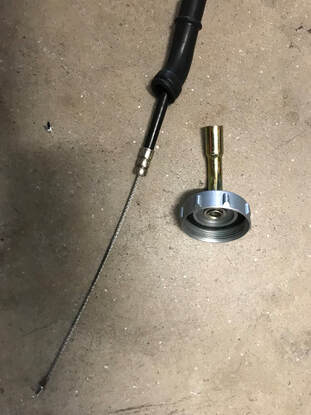
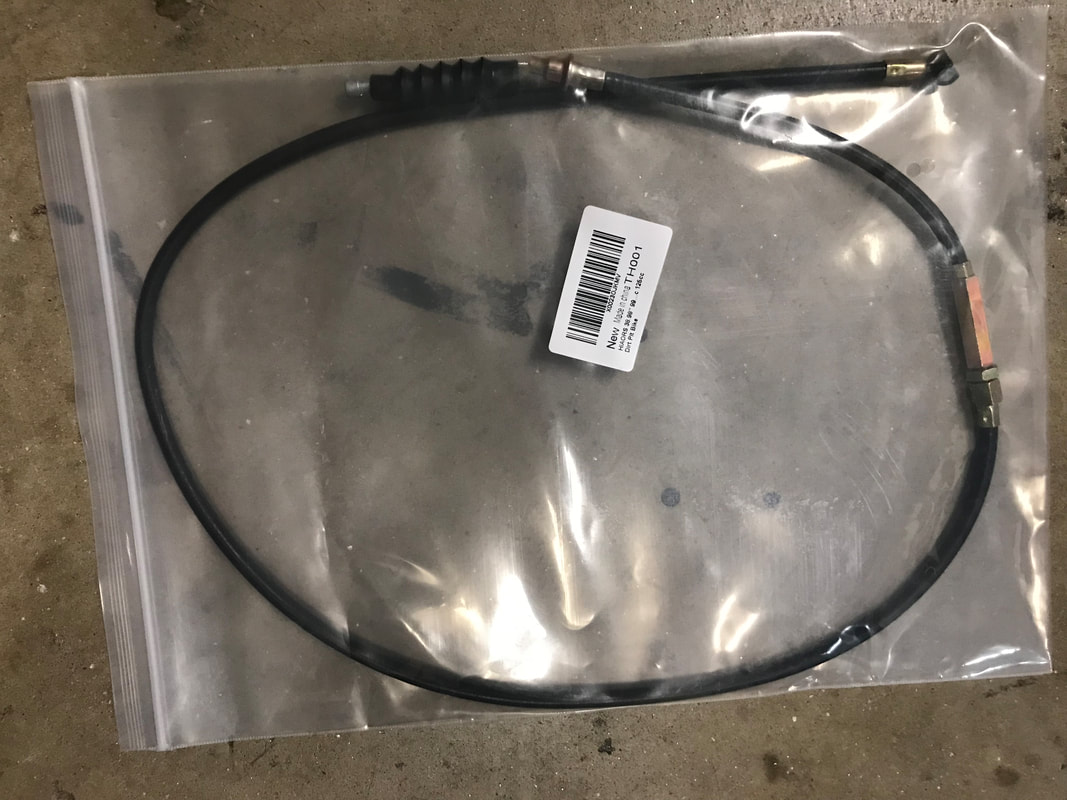
The original throttle cable is too short for the new VM 22 Carb. the OEM cable wont allow the throttle slide to go all the way down. Only the cable was needed. Its possible to remove the metal end adapter on the original cable which will give more cable length and will allow the needle jet throttle slide to go all the way down like it should. However, I found that I ended up having too much cable slack on the throttle twist and I couldn't adjust enough on the adjuster nut at the throttle twist handle to get enough slack out at that setup. In the pic below, you can see that on the original cable that removal of the end metal piece is easy. I used the rubber piece on my new cable I purchased from the link below.
|
|
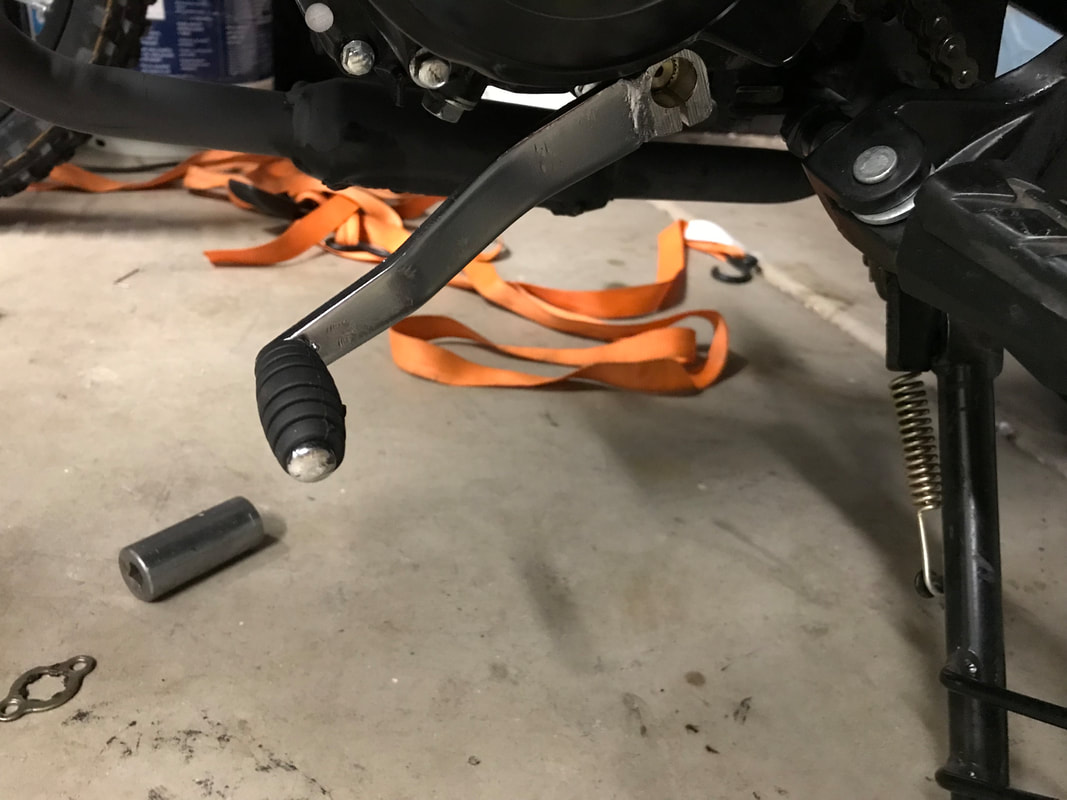
Boom Vader shifter mod and replacement shifter cable.
I found this chrome shifter to be a close match and is bendable to fit the original bend profile of the OEM shifter. At least pretty close anyway. It also mounts easily. The shift cable on my OEM finally broke at almost 2,000 miles on the Vader. I now keep a spare one of these under the seat. I put the shifter in the vise and put a little more angle into it so its comes out more to the foot peg. It worked pretty good. It also locked on the the shift spline solid.
I found this chrome shifter to be a close match and is bendable to fit the original bend profile of the OEM shifter. At least pretty close anyway. It also mounts easily. The shift cable on my OEM finally broke at almost 2,000 miles on the Vader. I now keep a spare one of these under the seat. I put the shifter in the vise and put a little more angle into it so its comes out more to the foot peg. It worked pretty good. It also locked on the the shift spline solid.
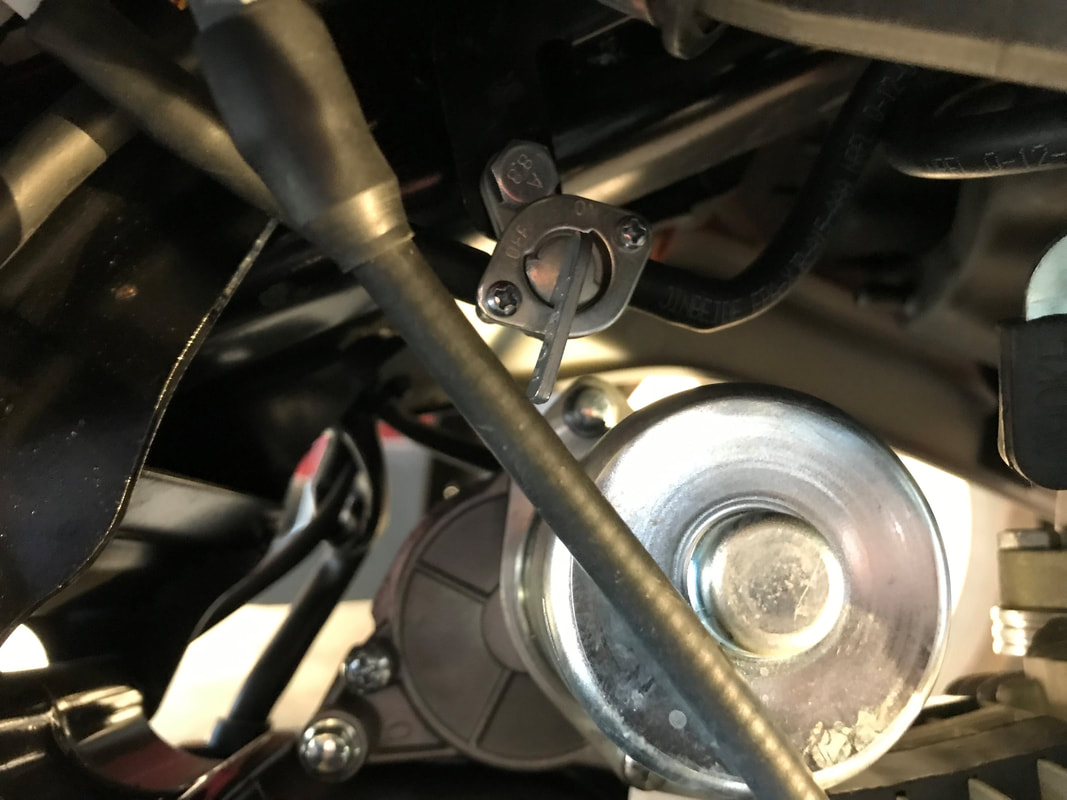
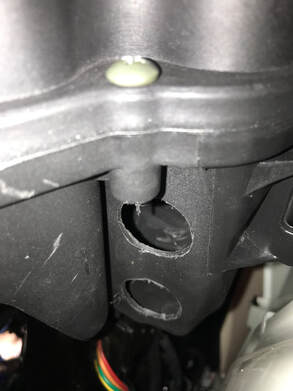
The Carb that I used and currently using a 105 jet and a 38 slow jet which came with the carb. I'm at 1468ft elevation. Idle mix screw about 1 turn out. Use the spinner to rotate the carb for a best fit. I later tried a 100 main jet and wow the performance was much lower. the ramp up speed to full throttle felt under powered. Would hardly get pass 45mph. The Boom Vader had an unused metal tab with a hold that was folded back. I didn't notice it before. But, it works out great to mount the new fuel on/off petcock.
|
|
|
|
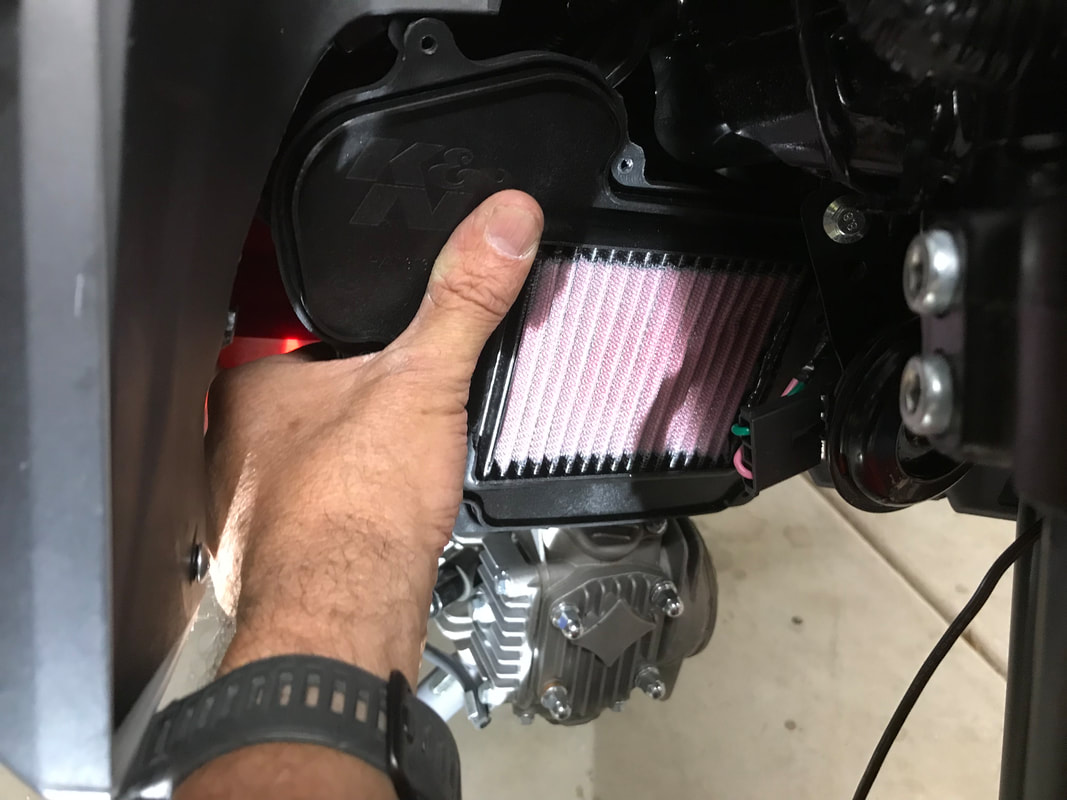
The OEM filter broke down and was falling apart inside. These are holding up way better
I changed out the front pinion to a 17 tooth.
Boom Vader Plastic Panel Removal
|
|
|
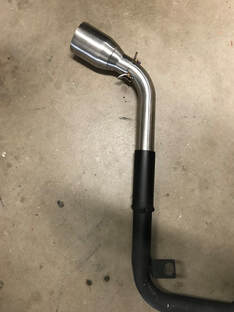
Pic on the right shows my OEM Boom Vader pipe with my modifications from the parts below.
|
|
|
|
|
|
One alternate low mount exhaust that would work without welding by other YouTube Boom Vader users is this exhaust from Amazon. It works easier because its a two piece pipe that make the adjustment to the header easier. It was also noted to use double gaskets on the header for a good fit. Same exhaust pipe used but the KIMSS pipe is not needed. To mount the exhaust pipe bracket will require a hole drilled on the back foot peg bracket. I'm using the NGK CR7HSA 4549 plug which cross referenced the original LG A7RTC. Gap setting 0.6 - 0.7mm
|
|
|
|
|
|
|
There are many names for these Honda Grom compatible brake and shift levers. These do fit the Boom Vader nicely. I use these on my Vader.
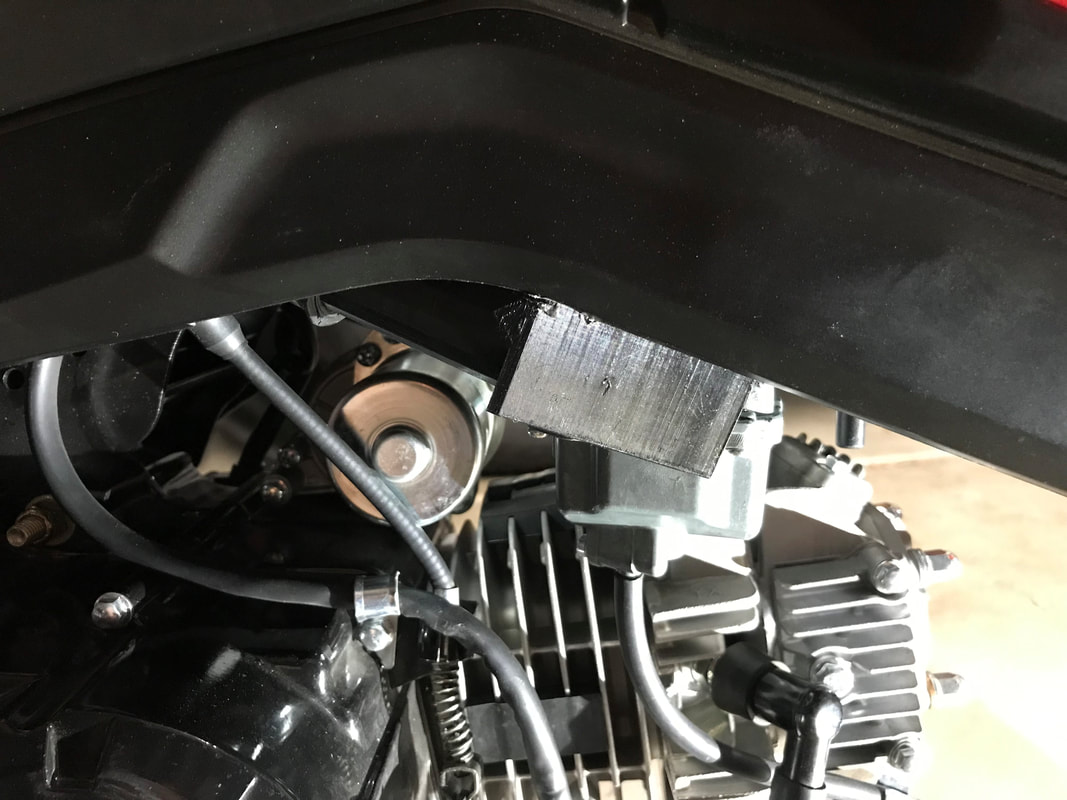
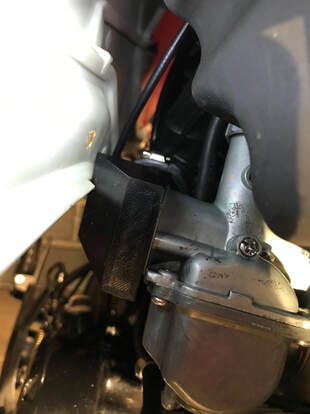
Trouble Shooting Fuel Delivery with Vapor Lock Up
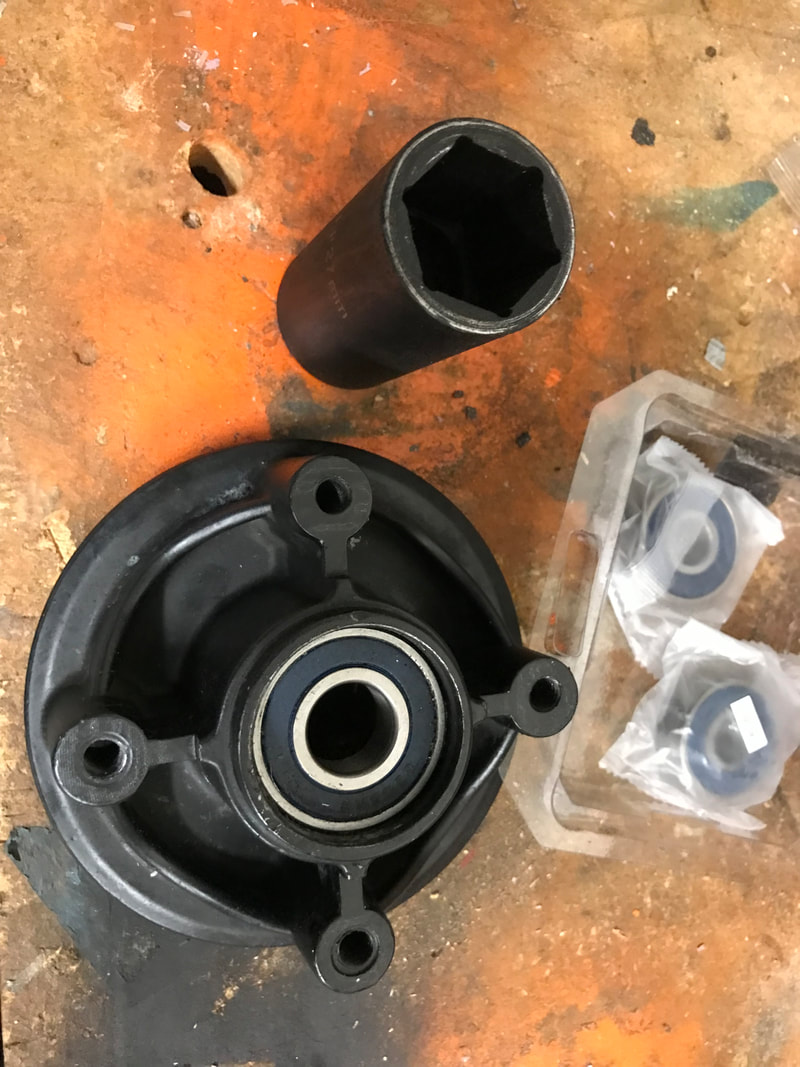
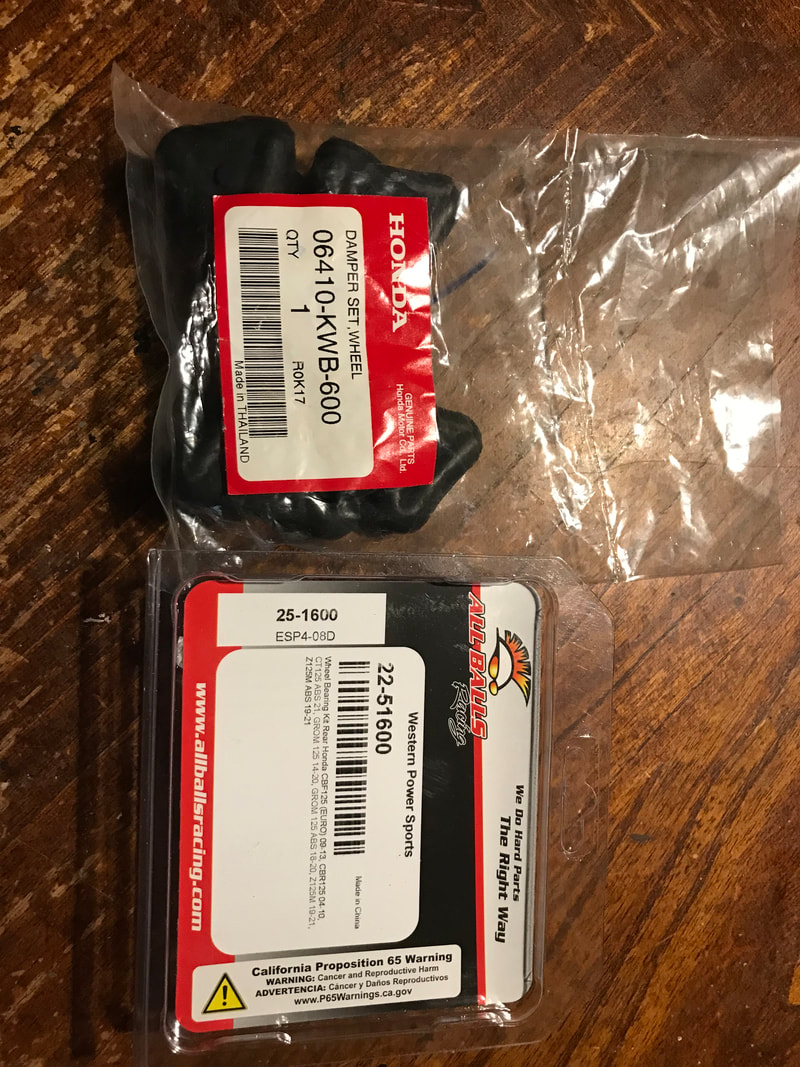
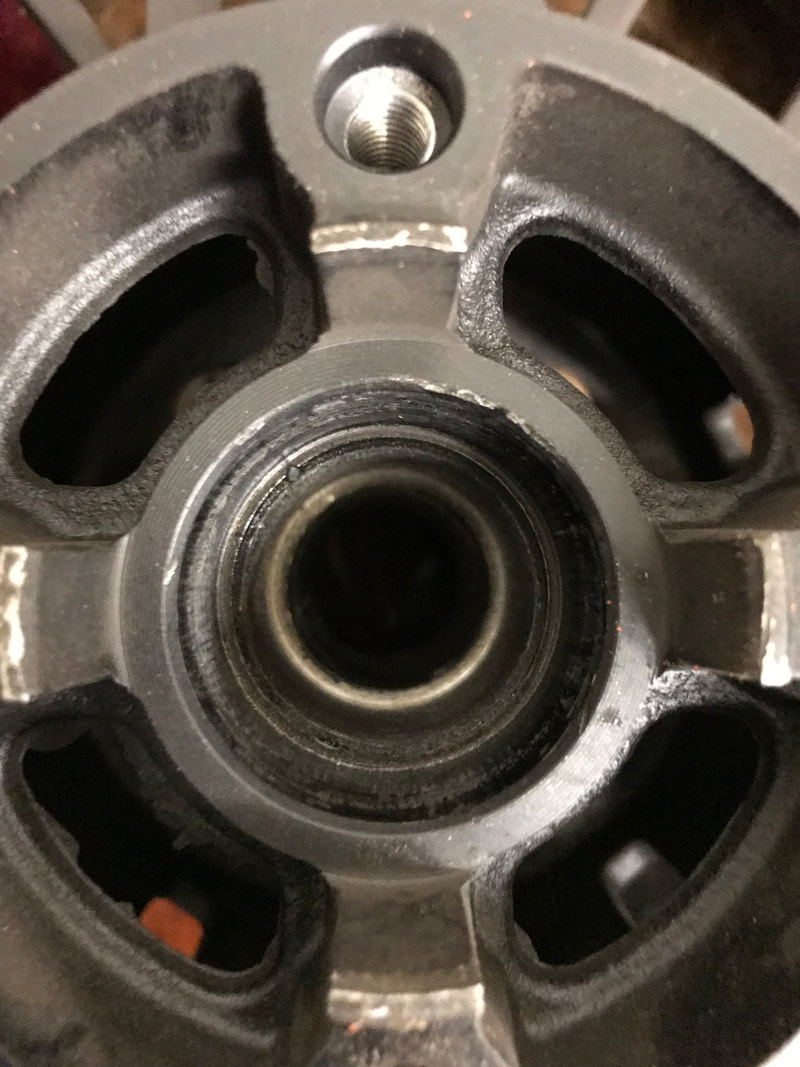
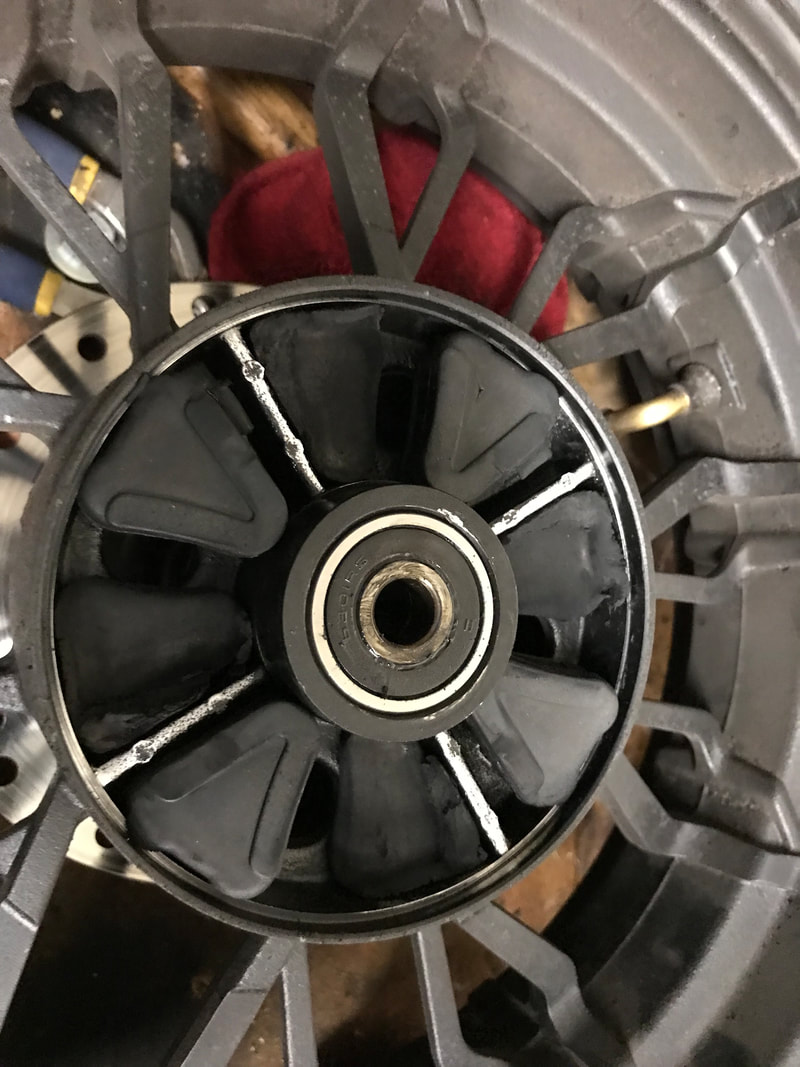
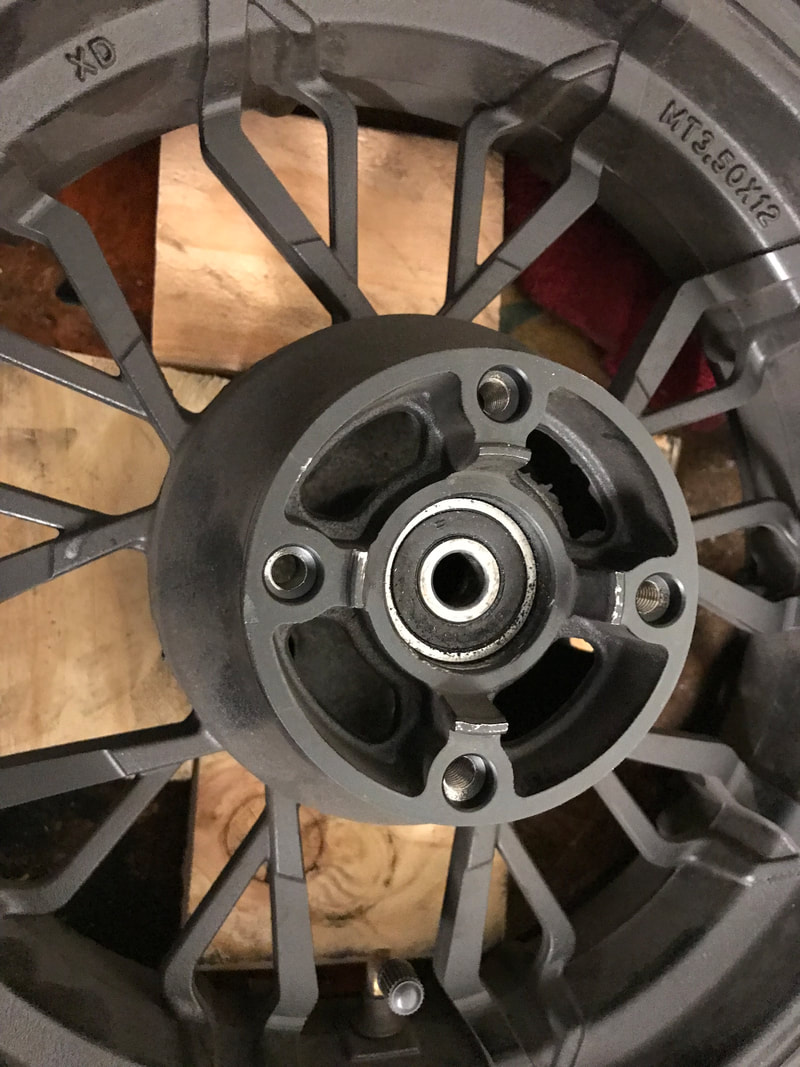
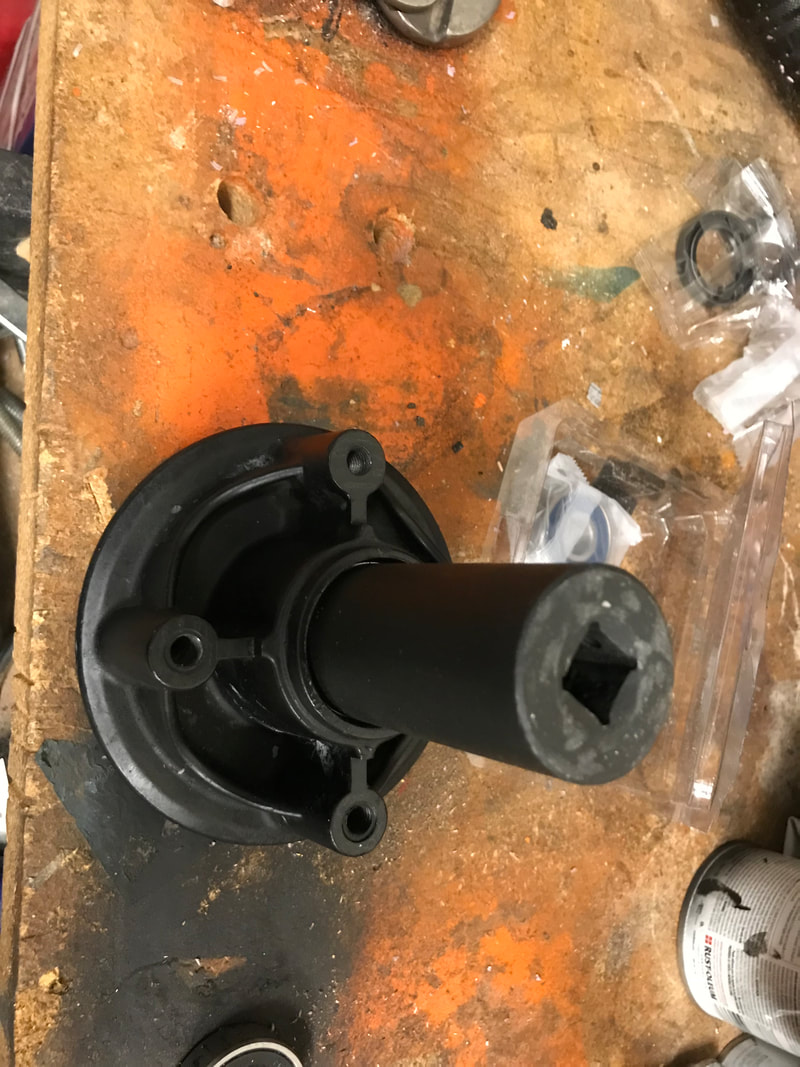
Boom Vader Rear Wheel Bearing Replacement.
With almost 2,ooo miles on the Vader it was time to check on the rear for bearing wear and cush bumpers plus change out the chain and sprockets. The cush bumpers i purchased through RevZilla or PartsZilla along with a new rear axle bolt and nut. The chain used was a 428 110 link and I removed one link for a good fit for adjustments as the chain "stretches". New sprocket is a 428 34T.
With almost 2,ooo miles on the Vader it was time to check on the rear for bearing wear and cush bumpers plus change out the chain and sprockets. The cush bumpers i purchased through RevZilla or PartsZilla along with a new rear axle bolt and nut. The chain used was a 428 110 link and I removed one link for a good fit for adjustments as the chain "stretches". New sprocket is a 428 34T.
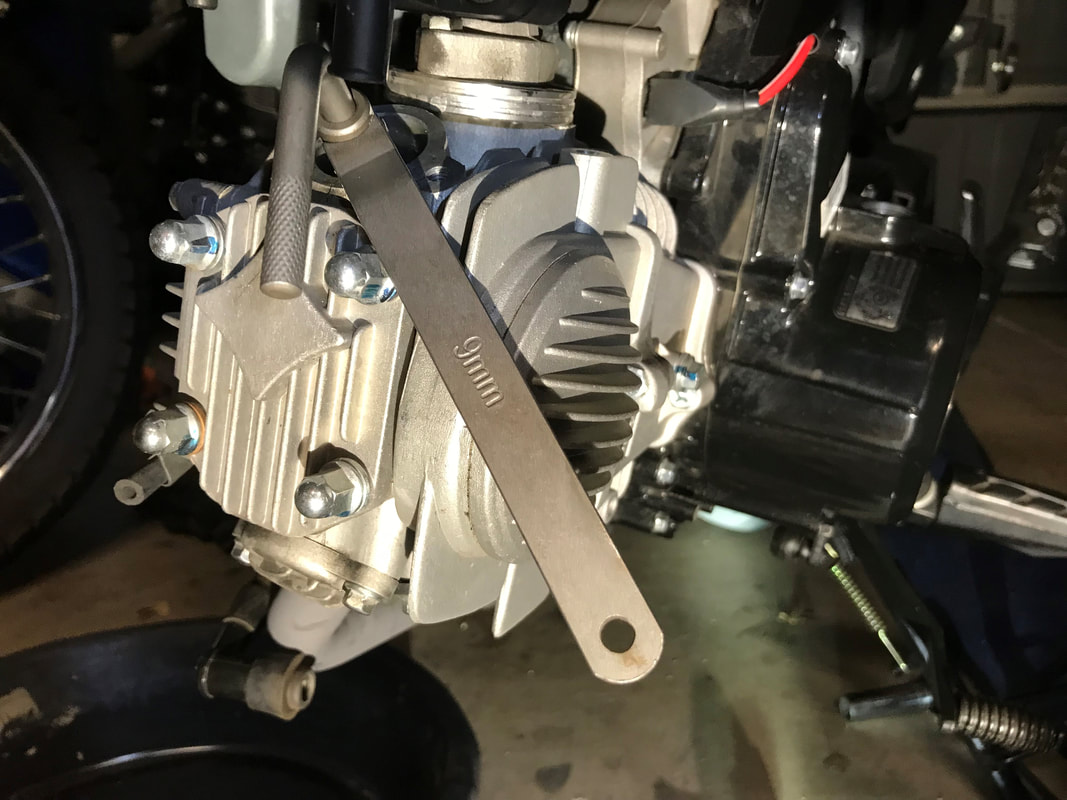
Adjusting the valve clearance
I used this tool from Amazon to easily adjust the clearance of the valve rockers. You'll need the 9mm wrench from the set. My own personal setting was .003 on the intake and about .003-.004 on the exhaust. I found some good info online to make the check and adjustment. Basically, i removed the sparkplug and removed the inspection cap (small one) and the large cap to put the socket wrench on to crank the crank shaft over to find top dead center viewing through the inspection hole. This motor didn't say F or T , but had an like an arrow for the T mark. I needed to crank it over at least two times to get the compression stroke for the arrow mark. Very important to adjust valves on the compression stroke. I used my finger in the hole of the spark plug to feel the pressure building upto the compression stroke and stopped at the arrow. I then removed the two valve cover caps. I then used the 9 mm tool to loosen the adjusting nut. Using a feeler gauge i was able to slip the gauge between the two surfaces of the adjusting bolt and the valve rocker assembly. While holding the top of the tool arm in place with the adjusting nut with slight pressure on the feeler gauge, I was able to lock down the adjusting nut tight by turning the wrench handle clockwise. This tool makes this task easier for me.
Engine Tools
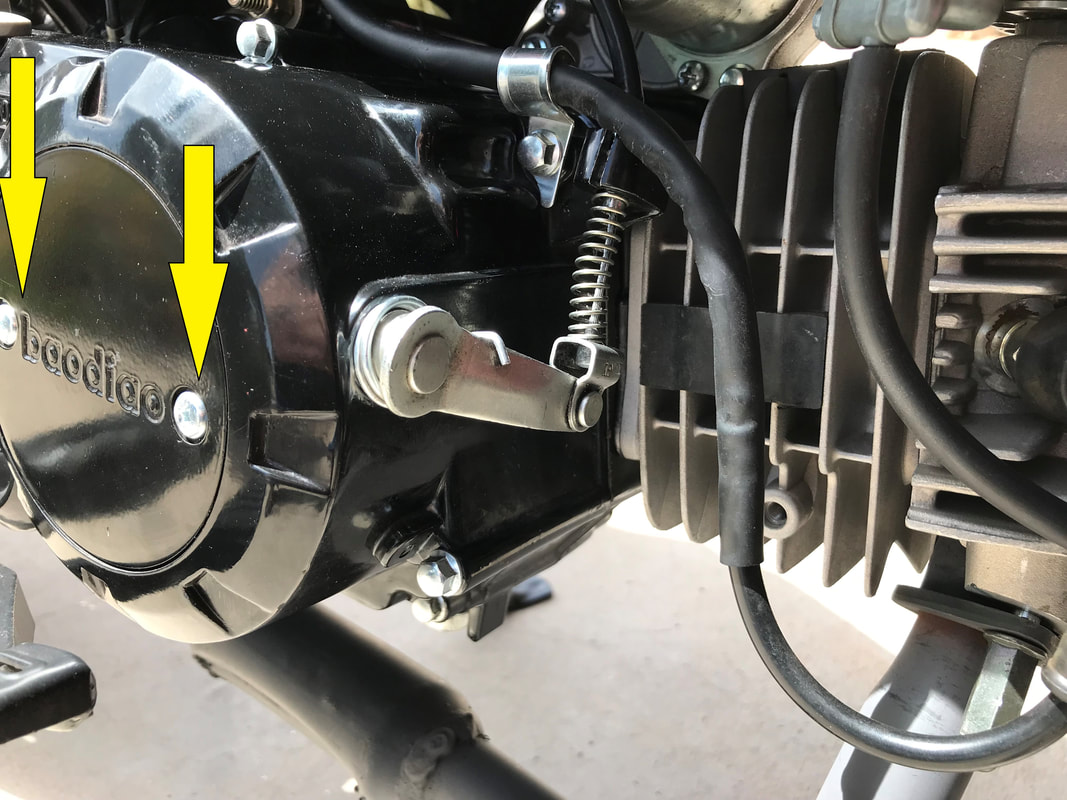
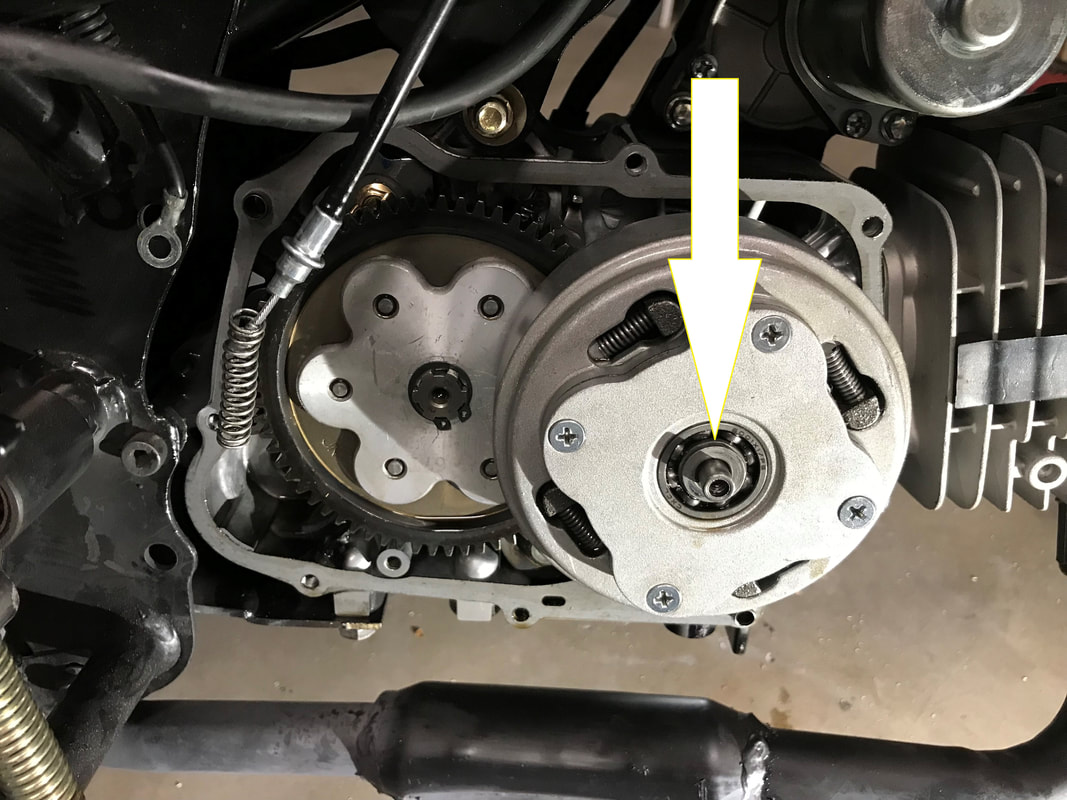
The phillips head screws on the engine are super tight and using a screwdriver alone may prove to be difficult and possibly end of stripping out the head. I used this style of impact screwdriver which worked excellent on the really tight screw heads. As in this video, I had to use this impact tool to remove the two cover screws to grease the clutch arm. I went ahead and replced these screws with similar from Ace Hardware metrics size.

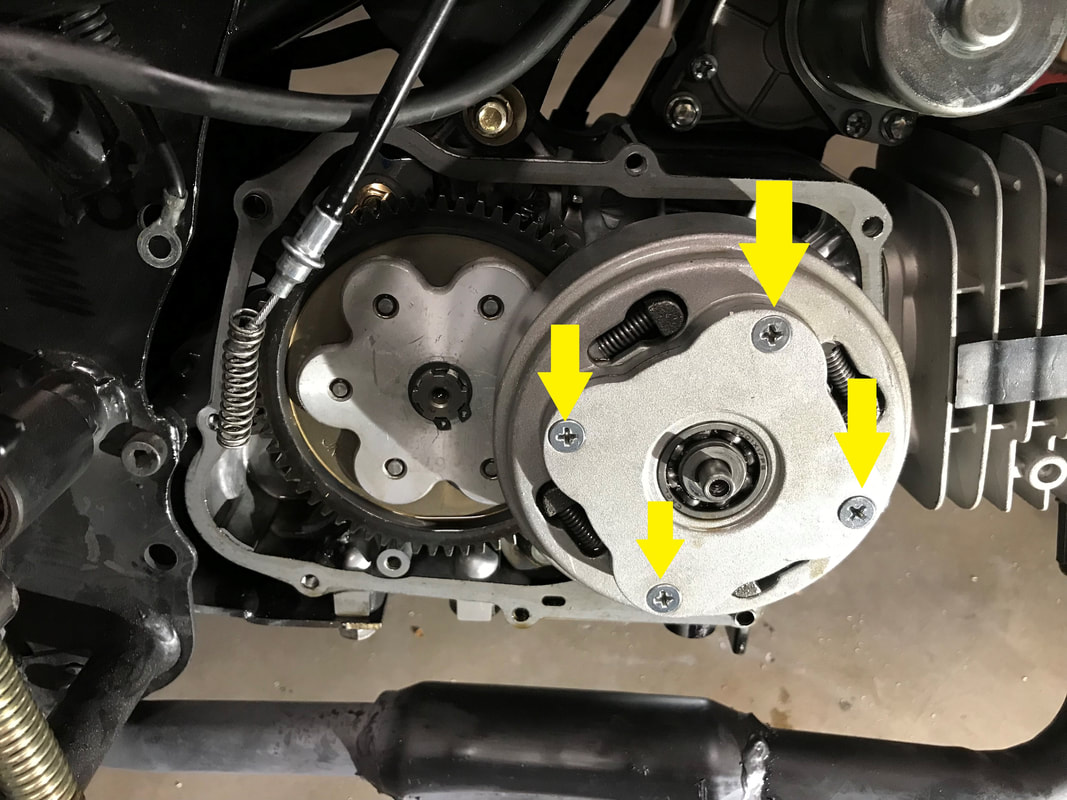
If removing the Clutch pack for Maint. The impact screwdriver will come in handy to remove the four screws
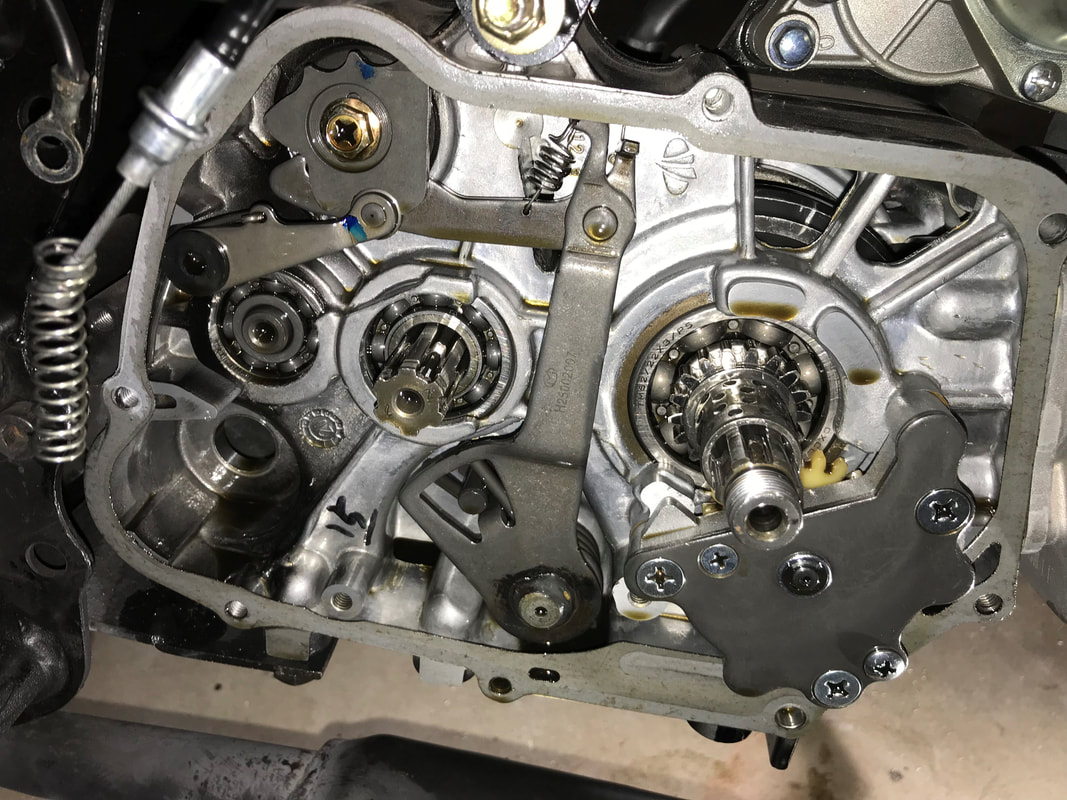
A video on the mechanics of the arm behind the cover plate.
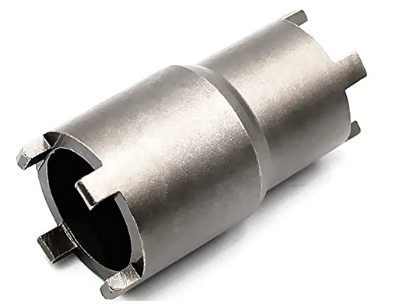
To remove the Inner nut, this tool 20x24mm will fit onto a socket end wrench 1/2 size. I ended up using an impact drive to quick remove the nut. Otherwise the gearing will turn on you while trying to untighten the nut.
After removing the four screws, the access to the nut can be reached with the tool above. Minibikeaction has a video on this motor for clutch removal
My arm was ok on the star adjuster
Affiliate link/advertising notice:
I am a participant in the Amazon Services LLC Associates Program, an affiliate advertising program designed to provide a means for sites to earn advertising fees by advertising and linking to AMAZON Sites. When you click on an Amazon link above and buy something through Amazon, Amazon may give me a small commission.
I am a participant in the Amazon Services LLC Associates Program, an affiliate advertising program designed to provide a means for sites to earn advertising fees by advertising and linking to AMAZON Sites. When you click on an Amazon link above and buy something through Amazon, Amazon may give me a small commission.
